Foraging for a Meal

Foraging for a Meal
Foraging for a Meal at 30 below!

Thursday, October 20, 2016

Hail the Determined Spider!

I know why spiders are so popular for Halloween.....across the northern tier of the United States these fuzzy little creatures have made their move to join the human population indoors for the winter ahead.  I am amazed by how many spiders have migrated in the past week - it seems like everywhere I go, they have set up turf indoors by installing the familiar web.

I found one dangling from the dining light this past weekend - just a little, teeny tiny thing - perhaps the inspiration for the child's rhyme, "....the itsy-bitsy spider....' of water spout fame. 

Although I am not a fan of spiders inside my house, I continue to be fascinated by the complex webs they create.....I think the book "Charlotte's Web" was so intriguing for many of us as children, because it often seems as if these little arachnids have super-powers. 

Catch a glistening web just as the autumn frost is burning off in the early morning, and the sparking moisture that clings to the complex pattern seems to dance.  We've all experienced that beautiful web cautiously guarded by a massive spider hovering near the anchor point on an overhang or beam.  These are the spiders that are just too large to wedge their way into a window crack or doorway jam for the autumn visit, however.....

......it seems as though they are rallying the troupes for one last hurrah before the freezes that are followed by snow.  Is it any wonder that American lore includes stalking and lurking spiders right along with skeletons, jack-o-lanterns and scarecrows........it's a wonderful mix of seasonal changes, harvest and......Halloween.


Wednesday, October 19, 2016

Using Multiple Blocks - Hand Carved Whenever Possible!

There is a new relief print carving material available at Blick.  To look at it from the side, it is half white and half gray - in layers.  There are no directions available with the material, but it seems that an artist could carve either side, depending on the end result preference.  The familiar pink material, made by Speedball, can be seen below with the two spiders.  Below them is the newest material carved with the white side on the bottom and the dark side on the top....that means the image was added to the dark surface, then the material that was removed with the carving blades revealed the white material underneath. 

The relief prints that result seem to be the same quality and ink coverage with both materials.  It will be interesting to see if they both maintain their integrity with use, over time.  I have had pretty good results with the Speedball material, using carved images two and three years after the original carving.  The skeleton is only the second image I have carved using this new material, so it has yet to pass the test of time and use.

In the third printing, the block did not seem to hold the ink as well as expected, but when using the white ink (see yesterday's post,) it did as well as expected and.....the white printing was actually completed after all of these images.....

The spider below is simply one of the Speedball/pink blocks , from above, printed on the scrap paper, then enhanced with some black line and magenta line drawings. 

I happened across a couple of wonderful spider rubber stamps on sale recently and plan to share those in a couple of days.....they have a much more authentic look than this whimsical, fuzzy dangler.  I received an email this morning advertising Halloween party supplies for sale and the tagline read, "Celebrating with scary or cute - we have it all......"  I am glad they were not selling scary clown products!!!


Tuesday, October 18, 2016

A White Ink Experiment!

How fun is white ink on black paper?  I really like the contrast of the white ink on the black background.  This white ink is not as opaque as I would like, but.....it's a good experiment.  The skeleton came out just as I expected!  I decided to try several images using the white ink on the black paper......

Skeleton - Hand carved block used to create relief print using white ink on black paper
The black cat takes on an entirely Halloweenish aura when printed in this way.....it's not only the fact that the cat is black, but the white outline also takes on a goolish or ghostly suggestion.  I did add the yellowy-green eyes, but that is the only addition to this print.

Cat - Hand carved block used to create relief print using white ink on black paper

The raven has the same positive features as the cat - the 'critter' is actually black - a plus for a Halloween image.  As with the cat eyes, I added beak, feet and leg color, but the rest is only black paper or white ink.    Of course the purple paper in the background helps create a wonderful contrast!

Raven - Hand carved block used to create relief print using white ink on black paper
I am not as pleased with the image below - For one thing, I tried to do multiple images on one piece of black paper....too busy!  Ghostly dandelions and their dried, flying seeds are just not haunting good fun.  I really like trying these different images to get the feel for the medium.

Dandelions with airborn seeds - Hand carved block used to create relief print using white ink on black paper
It is interesting that the vulture takes on a more cartoonish feel than a ghostly aura using the white ink on black paper.  As you can see below, adding the red neck and head, along with yellow beak and feet does not support the Halloween feel.....still cartoonish.....

Vulture - Hand carved block used to create relief print using white ink on black paper


So, of the five white ink experiments, three have an effective impact and two are better using different medium/colors/ and or background......I'll share those between now and Halloween....bet you're excited now, ah?

Monday, October 17, 2016

Block Carving and Relief Printing AGAIN......

I decided to carve a block to use in making a relief print of a skeleton.  My results capture the essence of a skeleton, but not with tremendous anatomical accuracy.  The knee swelling must be a reflection of how my knee was feeling the day I was carving, for example.  Nonetheless, the tone of skeletal bliss exudes from this fine specimen.

For the first printing attempt, I grabbed a piece of the scrap paper I had cut down for practice, drew in a little heart to add whimsy, and printed away.  You'll remember background image of the next print from yesterday.  This time I added a relief printing on top of a two-layer ghost printing - also fun AND I like the fact that the skeleton representations are different in the top two layers.

Next, I printed on top of a gelli print where I had done some quick ink shifting and removal (I say quick because any 'on the plate' work has to be completed while the plate is completely wet,) of ink with the intent of adding the skeleton relief print later.  Although I think it would work better with more contrast in tone, I like the idea. 

I am intrigued by the idea of actually adding the top relief printing layer using white ink (afterall, it is a skeleton,)  but have to work to find a white ink that is opaque and not transparent......I wonder if gesso or white acrylic paint would work WITHOUT damaging the block.........on to experimentation!!!!! 

Sunday, October 16, 2016

Ghost Images Using the Gelli Plate

I started to experiment with monoprinting and thought these skeletons would fit the next holiday.  The image below was made by simply inking the gelli plate, then dropping in paper cut outs of two skeletons.  Next, I dropped the printing paper on top of the plate and applied even pressure to transfer the exposed "ink" onto the printing paper. 

After removing the printing paper from the plate, I lifted off both of the paper skeletons.  Then I created the next image by allowing the plate to dry still carrying outlines and some background orange from the first printing (waiting about 10 seconds,) then lightly re-inked with yellow.  This inking is more delicate work because if you use too much 'ink' OR too much pressure, you lift the edges of the image you hope to capture.

As you can see in the image below, this attempt worked fairly well, although the right half of the plate could have used just a touch more yellow ink. 

The image above has been created by lifting the dried edges of the first printing from the plate.  Although these images are touchy to create, I really like the effect and no two are alike.  

In the image above, the ghost image from the second printing (of a different plate) is very faint, which works well with the superimposed stamp of the skeleton to the right of the ghost image.  Although I am not a big fan of stamps, this one is nicely detailed and combines well with its' ghost partner.

The image above is actually the layering of three different printings, one of which is the skeleton ghost printing.  The portion in the lower right hand corner is from a stencil that contained words that I happened to lay down backwards.  I like the effect and the colors, but am not sure this will fit within the context of pages I am creating.  We'll have to wait and see if there is a fit when all of the pages are complete. For now, it is fun to work with the multiple printings on the gelli plate to create "one of a kind" monoprints! 

Saturday, October 15, 2016

Are You a Corn Fan????

Are you a candy corn fan?  Although you would not think it to look at me, I am not a big sweets fan AND I have never really understood the passion some people have for candy corn.  I remember a lengthy discussion several years ago about how much candy corn/smoked peanuts mix a person could eat at one time without suffering consequences....of a trotting nature.

While I think they are festive and one of the significant harbingers of fall...and particularly Halloween, I have never understood their waxy appeal. 

Just a couple of years ago one of our sons made his own version of candy corn.  The kernels were massive pale pink, darker pink wedges that were significantly chewier and creamier than any orange/yellow/white bullets I have experienced.  They also had a strong fruity fragrance that was appealing.....that's when I learned that candy corn is supposed to be taffy......go figure!!

Recently I have seen really big traditional candy corn kernels....( of course I have also seen some massive marshmallows that could be dried and used for a baseball, they were so large.)  Again, these giant kernels are very festive and would be cute to decorate for a seasonal party...I just cant imagine eating one.  It seems like you would have to slice it to be able to eat it.......If you have one of these gems, please share how you tackled consumption.

These prints were another example of those test prints on scrap paper .....then decided to add color.  Once again, I like the mixed media effect!

Friday, October 14, 2016

Trick or Treat!!

It was a beautiful autumn day in Minnesota with a crisp chill in the air, the sun illuminating the changing colors of leaves on the trees, and rows and rows of pumpkins exposed in the fields they have grown in during the long, wet summer.  Much of the local area experienced frost last night, although I think the vines and foliage surrounding the pumpkins have been wilting and drying down for the last several weeks.  The intense orange orbs scattered across several fields I passed today provided a seasonal reminder that Halloween is just a couple of weeks away.

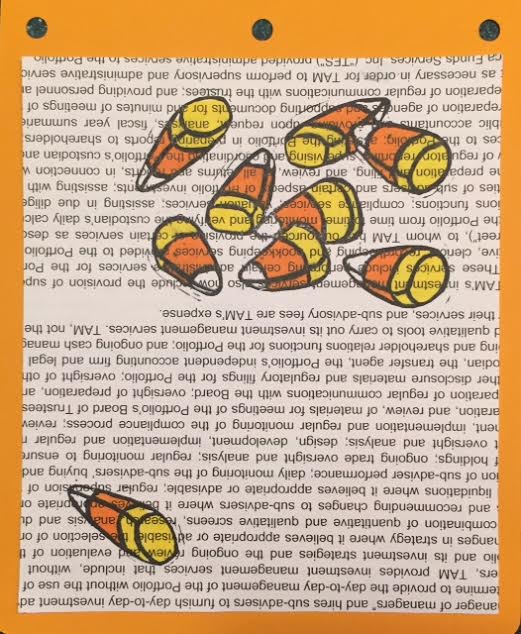
Both of these pumpkins are actually hand carved blocks.  I decided to ink and print them on scrap paper to see what they look like.  Once I filled in the images with color, I kind of liked the mixed-media effect  created.  I would like to find an old text that is filled with farming or pumpkin language to print these images on.....

.I have seen the work of an artist (I am sorry, but I cannot find her work or her name on line now,) who does pen and ink sketches on old dictionary pages that match the image she is sketching - stunning.  The last one I remember seeing was an inked drawing of several types of scissors, then hand colored.  At the top of the page was the header word, "SCISSORS" and the definition of the word, in classic dictionary form, was visible within the borders of the overall image she had created......very clever and visually stunning.


Although I didn't think of that work until I had printed a couple of these and hand colored them on recycle paper, it did make me think of that work - the dictionary page made a significant addition to solidify the image.

I do plan to continue sharing Chicago images early in November, but for now, I am taking a little side trip into seasonal images.....there will be very few people in the mix......I think we are all "PEOPLED" out with the constant venom in the media......let's go for a little traditional spider, rats, poison, etc. seasonal festivities and NO..........I am not counting the ELECTION as a seasonal festivity!!!

Watch for treat sales!!!!