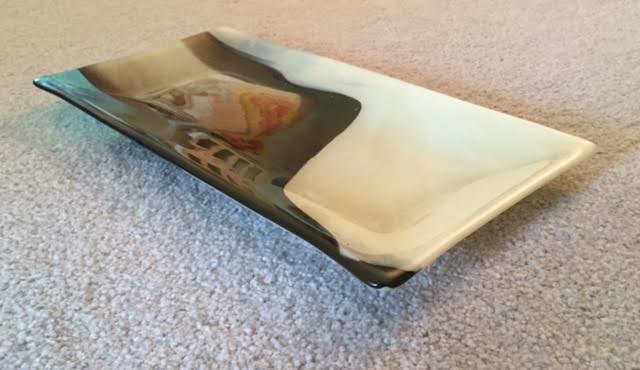
A large serving platter occasionally comes in handy, so I decided to make one using a specialty glass. Because of the complexity and uniqueness of cascade and infusion glass, I decided to do very little cold working and just let the glass make its own statement.
 |
| Serving platter using French vanilla and light turquoise cascade and inclusion specialty glass from Bullseye. |
This particular piece of glass is made at the factory by combining two colors of glass: light turquoise and French vanilla. So, where does that other brownish color come from, you ask? Let's take a look.
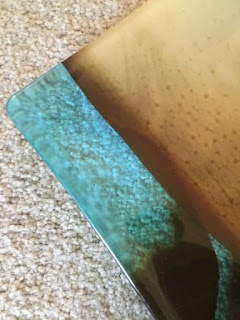 |
| Serving platter using French vanilla and light turquoise cascade and inclusion specialty glass from Bullseye - focus on light turquoise. |
|
Light Turquoise is a copper bearing color. In fact, all of the glass colors that fall in the aqua, cyan, turquoise, and even emerald green and teal green are bluish because of copper.
 |
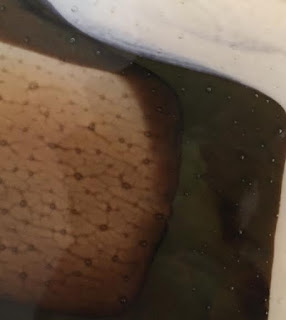
| Serving platter using French vanilla and light turquoise cascade and inclusion specialty glass from Bullseye |
- focus on French vanilla. |
French vanilla (the creamy, whitish color,) is a sulfur/selenium bearing color. Glasses in the yellows, golds, and red ranges, such as medium amber, marigold yellow, cinnabar opal, pumpkin orange, and tomato red, contain sulfur/selenium to create their color.
 |
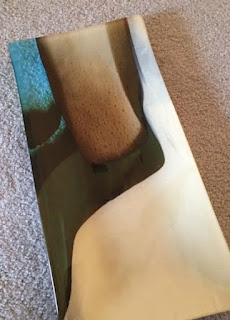
| Serving platter using French vanilla and light turquoise cascade and inclusion specialty glass from Bullseye - focus on location in glass where the two colors mixed in the manufacturing process. |
|
Where these to colors of glass mix, a reaction takes place, resulting, in this case, in the range of brown colors, as seen in the close-up above.
(Many glasses containing sulfur/selenium can also be stained if fired with silver.)
 |
| Serving platter using French vanilla and light turquoise cascade and inclusion specialty glass from Bullseye - emphasis on cascading effect and gravitational pull in the manufacturing process. |
|
When these sheets of glass are created, the molten Light turquoise and French vanilla come out of separate crucibles and flow downward (or cascade,) covering the rolling sheet. Where the touch and begin to mix (infusion), the reaction occurs. Think of the image above as a flow of hot, molten glasses flowing together just prior to cooling to a solid state.
 |
| Serving platter using French vanilla and light turquoise cascade and inclusion specialty glass from Bullseye. |
|
I cut this piece of cascade and infused glass to form this large serving bowl, then fused it with a sheet of clear 2mm glass. For the second firing, the combined glasses were slumped into the bowl shape.
The set of coasters sited in yesterday's post contains the scraps (mostly French vanilla,) remaining from this larger piece.


