It is not until you tilt the glass sideways, and take a more vertical view, that the image looks more like a bas relief than a 3-D sculpture. Even though the free form stringers had depth and volume, the heat of the kiln and gravity once again combined, to bring the waves and curls to the lowers horizontal surface.
 |
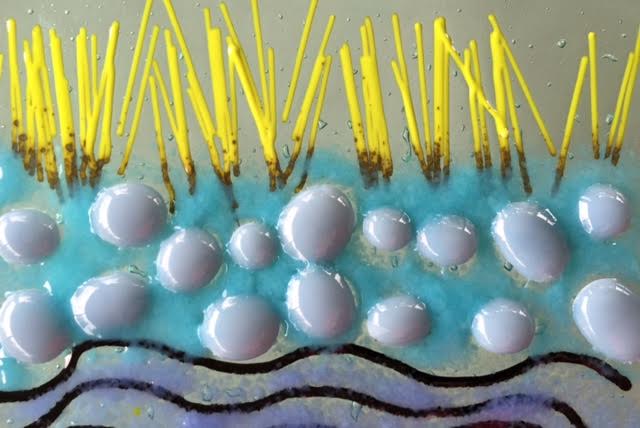
| Freestyle fabrication - gravity stringer, dichroic frit, clear and
reactive white glass hand shaped on grinder, with heavy shelf paper cut
to create 3-D surface for cap and 3 tentacles. Tack fired. |
The majority of time, the viewer would be gazing at this piece from straight ahead and not at this contrived angle, so the jelly representation is maintained.
 |
| Freestyle fabrication - gravity stringer, dichroic frit, clear and
reactive white glass hand shaped on grinder, with heavy shelf paper cut
to create 3-D surface for cap and 3 tentacles. Tack fired. |
The bottom 3 images are consistent with a traditional viewing. Perhaps the possibility of the viewer to reposition him/himself multiple times in relation to any art form is the test of the piece's integrity.
 |
| Freestyle fabrication - gravity stringer, dichroic frit, clear and
reactive white glass hand shaped on grinder, with heavy shelf paper cut
to create 3-D surface for cap and 3 tentacles. Tack fired. |
I would argue that part of the test of the art's integrity is forever linked to the intent of the artist. Perhaps that is part of what keeps us so connected to painting, sculptures, vases, etc. created by long deceased artists. (For some viewers it is certain to be the monetary value, as well. )
 |
| Freestyle fabrication - gravity stringer, dichroic frit, clear and
reactive white glass hand shaped on grinder, with heavy shelf paper cut
to create 3-D surface for cap and 3 tentacles. Tack fired. |
Begs the question - How do we know the intent of the arts? If they have recorded their thinking in text or video, etc., are we to take each at face value? Does it matter, or does the viewer have carte blanche to assign whatever meaning chosen based on their experiences??? Viewing judges, just the the latest nominee to the supreme court, have yet to be appointed!
 |
| Freestyle fabrication - gravity stringer, dichroic frit, clear and
reactive white glass hand shaped on grinder, with heavy shelf paper cut
to create 3-D surface for cap and 3 tentacles. Tack fired. |
So, for now..............................choice is YOURS!